AWS Client VPN - It exists!
I’m not sure how I missed the announcement from December 2018. In case you are like me and missed it, too, AWS announced AWS Client VPN on December 18, 2018. Ever since I started using VPCs in the early 2010s, I’ve wanted a baked-in VPN solution for accessing resources in a VPC. OpenVPN running on an EC2 was and still is a solution, but it is a significant effort to get up and running and to maintain.
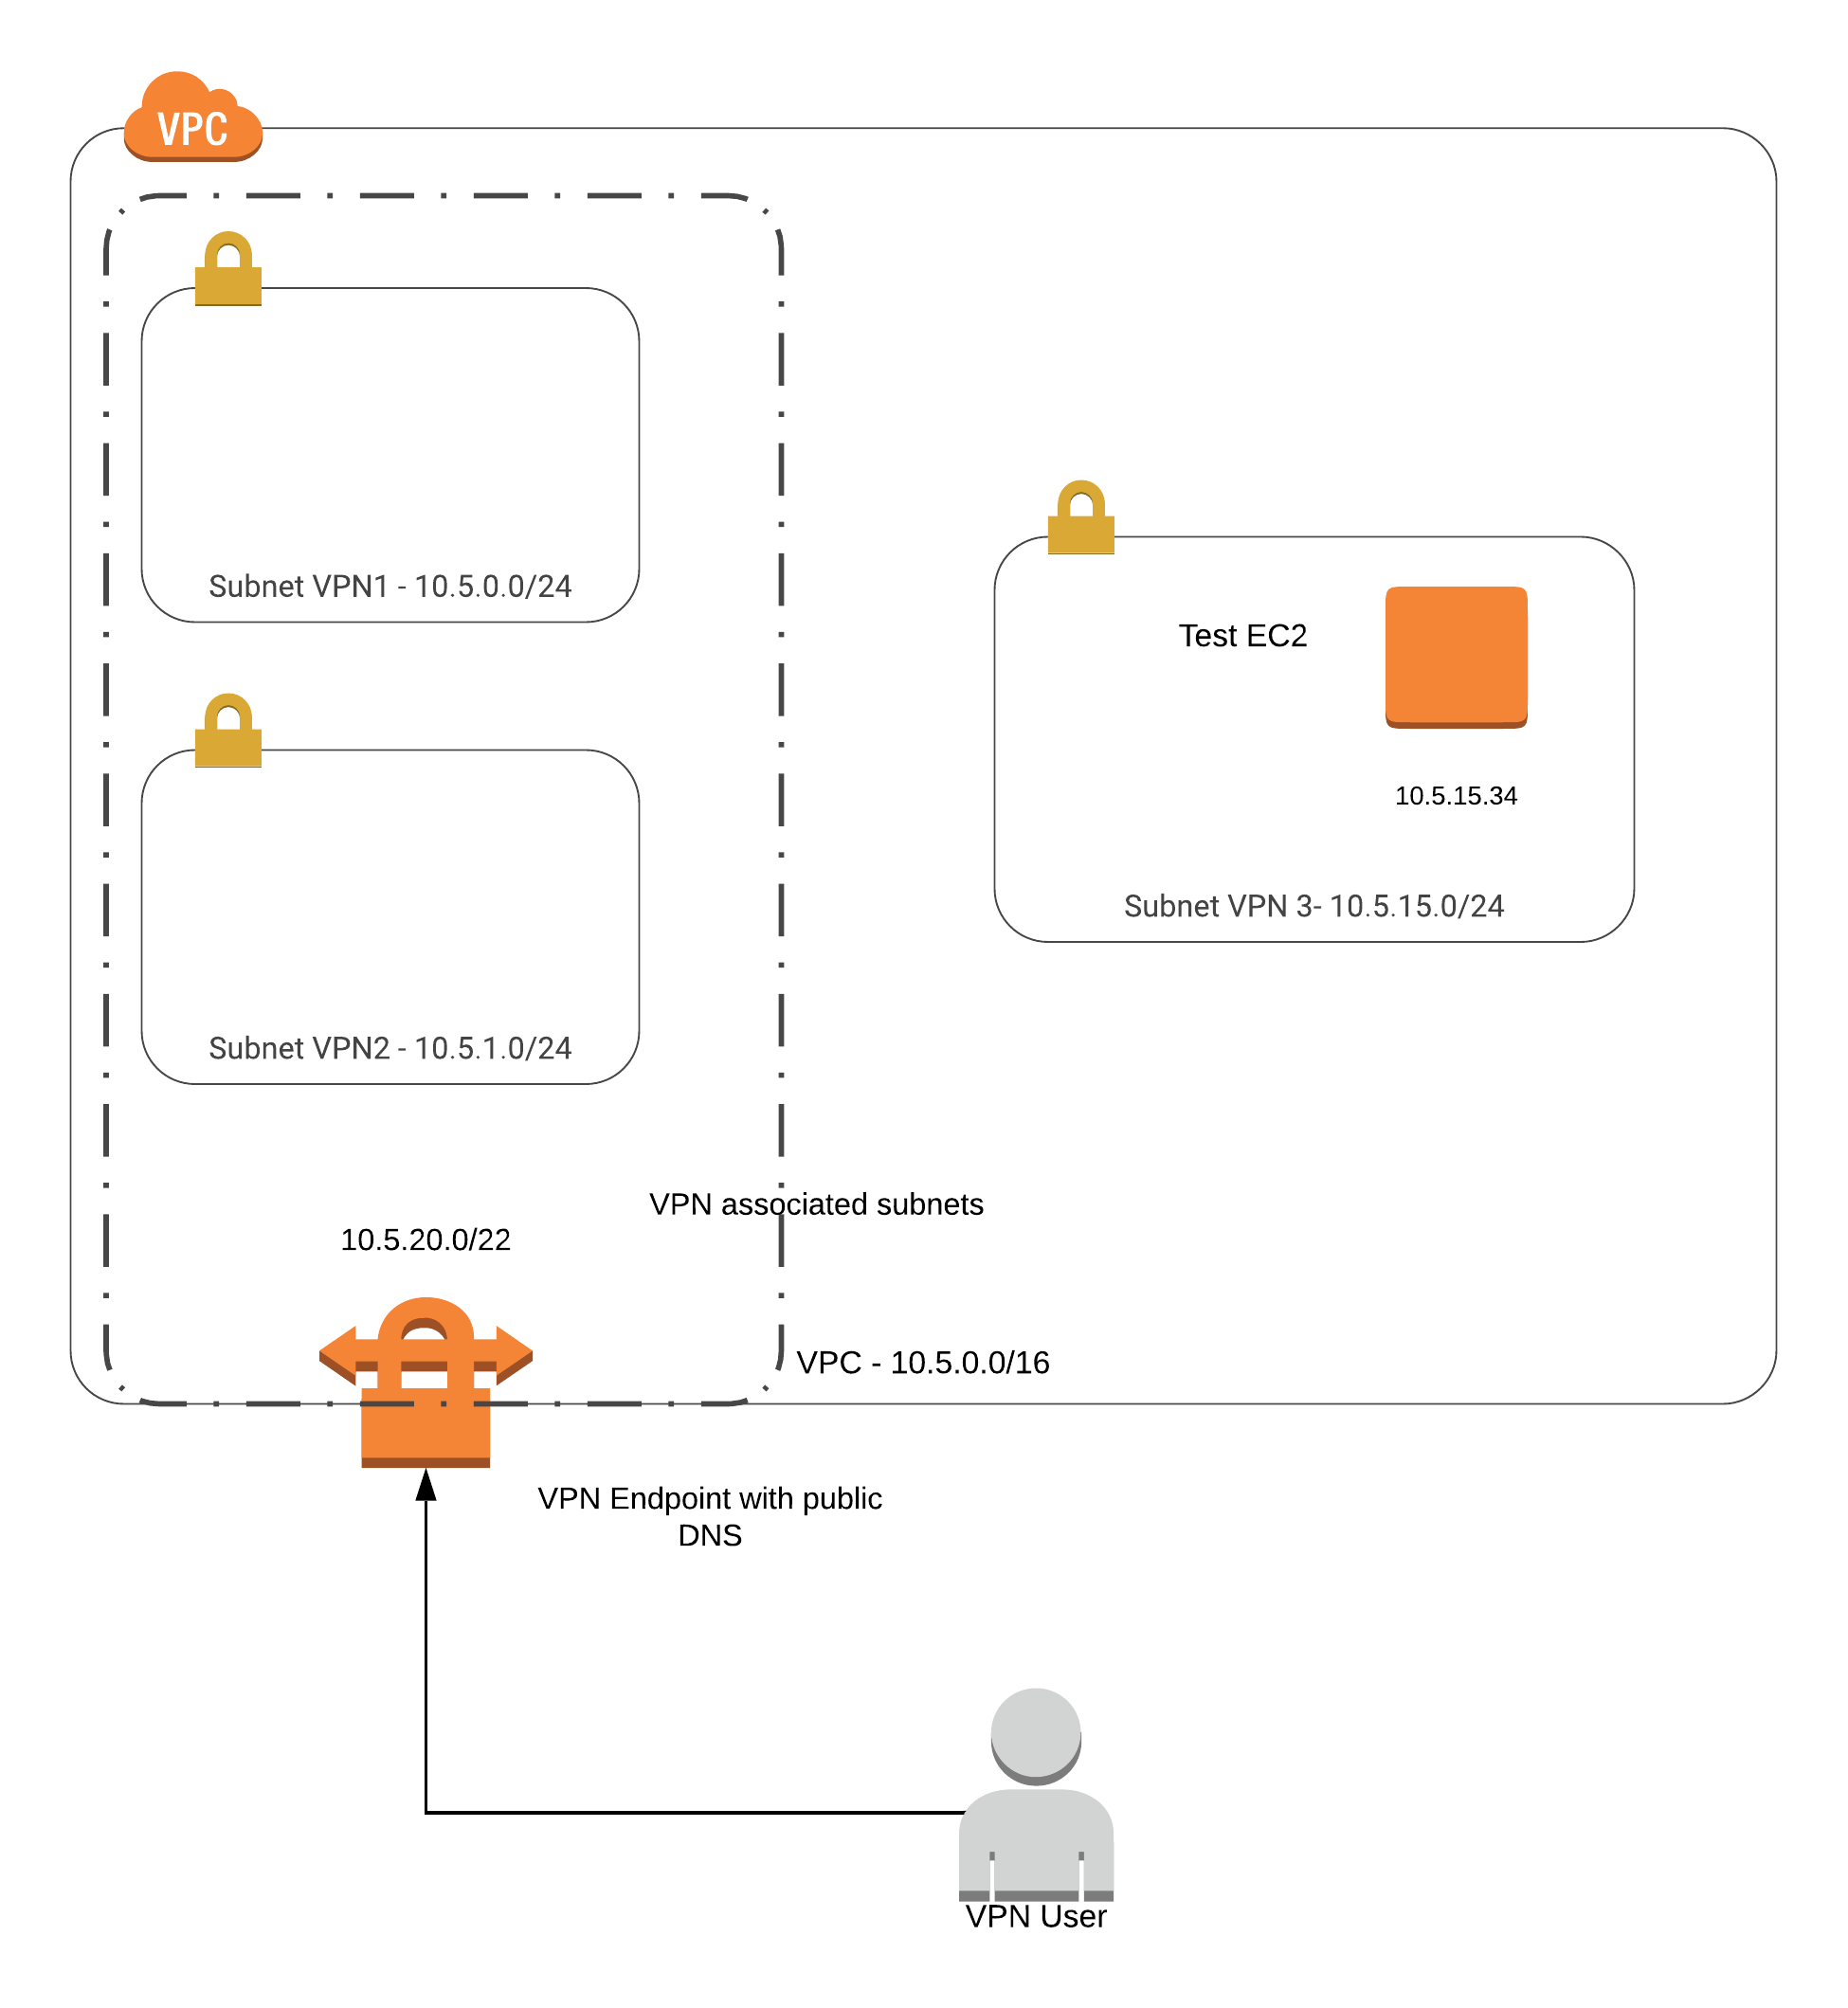
Here is my walk-through of testing the feature. As always, let’s start with a picture.
Assumptions
- AWS account already exists
- AWS CLI is locally installed
- AWS access keys are set up
- Ability to log into the AWS Console
VPC Setup
Create VPC
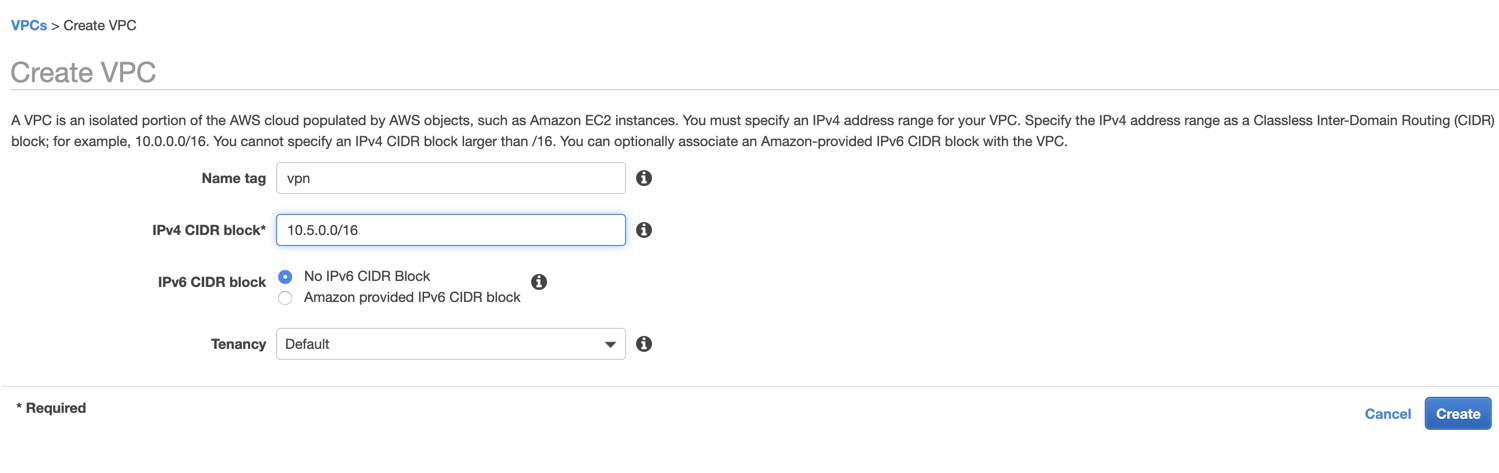
I start by logging into the AWS Console and click on the VPC service. I create a test VPC, calling it vpn. I set a CIDR of 10.5.0.0/16 which gives me 65536 IPs to play with. If you are like me and don’t deal with CIDR too often, try CIDR to IPv4 Conversation. It is helpful too.
Create Subnets
Next, I create three subnets in the vpn VPC. I do this by clicking on Subnets in the left navigation of the VPC Dashboard and then clicking the Create subnet button at the top.
- vpn1 with a CIDR of 10.5.0.0/24 in us-west-2a
- vpn2 with a CIDR of 10.5.0.1/24 in us-west-2b
- vpn3 with a CIDR of 10.5.0.3/24 in us-west-2a
The two subnets vpn1 and vpn2 will be used for the VPN Client association which I’ll get to in a bit. The subnet vpn3 will be used to host a private EC2 instance which I will use to test access to upon completing the vpn set up.
Create EC2
I add an EC2 to my VPC by going back to the AWS Console and clicking on the EC2 service. Once in the service, I click on Launch Instance. It does not matter what AMI base image I use for this testing. So, I pick the default Amazon Linux 2 AMI (HVM), SSD Volume Type and click Select. For the instance type, I choose the smallest, a t2.nano and click on Next: Configure Instance Details. Here I keep the defaults except for the following.
- Network: I set to the newly created vpn vpc
- Subnet: I set to vpn3
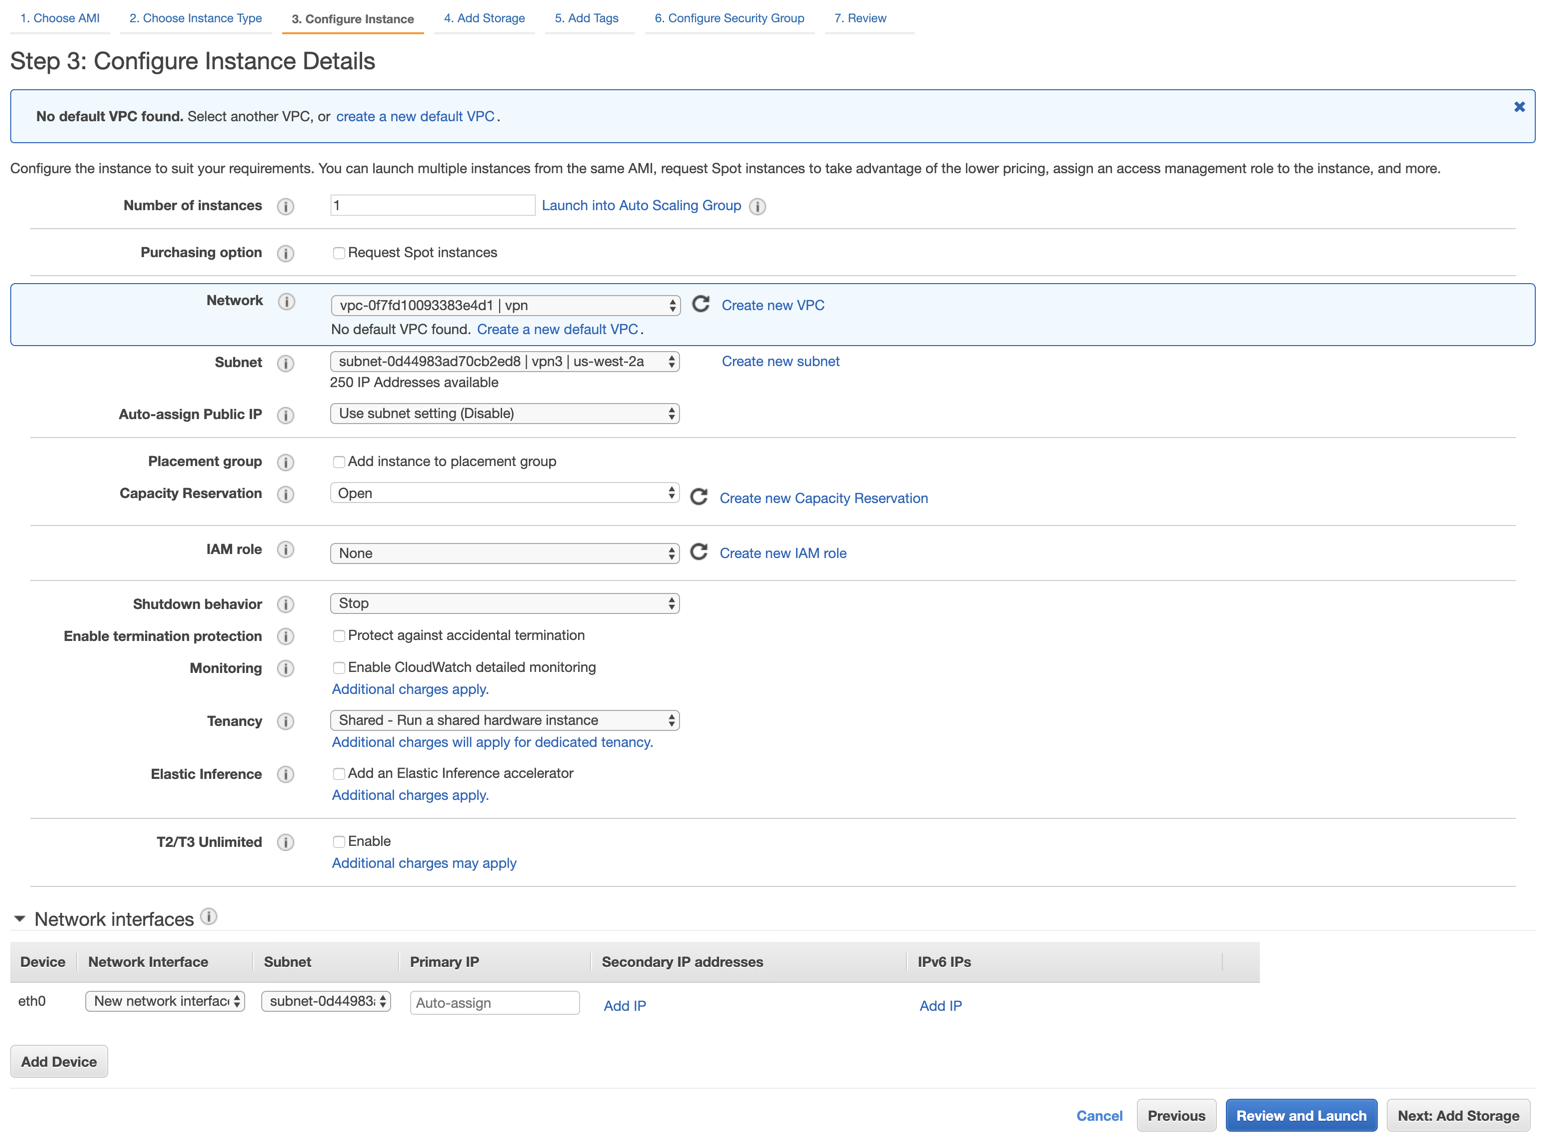
At this point, I click on Review and Launch skipping the storage and tag customizations.
Client VPN Setup
I let the EC2 spin up and move on to creating the client vpn. I am using AWS document as my guide to complete this walk-through.
Mutual Authentication and Generating Keys
It looks like the AWS VPN Client allows for two types of authentication – Active Directory and Mutual. Since I don’t have an Active Directory in my environment, I go with Mutual authentication which requires one to create public and private keys to authenticate.
To make this process simple, AWS provides a how-to to configure the keys.
AWS recommends grabbing the following github repo to generate the necessary keys.
I launch a terminal and type the following commands.
git clone https://github.com/OpenVPN/easy-rsa.git

cd easy-rsa/easyrsa3

./easyrsa init-pki

./easyrsa build-ca nopass

./easyrsa build-server-full simplyroger nopass

./easyrsa build-client-full roger.simplyroger.com nopass


mkdir ../../custom_folder

cp pki/ca.crt ../../custom_folder

cp pki/issued/simplyroger.crt ../../custom_folder

cp pki/private/simplyroger.key ../../custom_folder

cp pki/issued/roger.simplyroger.com.crt ../../custom_folder

cp pki/private/roger.simplyroger.com.key ../../custom_folder

cd ../../custom_folder

aws acm import-certificate --certificate file://simplyroger.crt --private-key file://simplyroger.key --certificate-chain file://ca.crt --region us-west-2 --profile=simplyroger

aws acm import-certificate --certificate file://roger.simplyroger.com.crt --private-key file://roger.simplyroger.com.key --certificate-chain file://ca.crt --region us-west-2 --profile=simplyroger
If you wish to run this, swap out the following parts of the above.
- Replace simplyroger and roger.simplyroger.com with your server and client information.
- the aws cli command aws acm … assumes the aws cli is installed and credentials are configured in the –profile=simplyroger. Change this to your profile (or remove the –profile section entirely to use the default).
After running the aws acm commands, I get back a CertificateARN= response. I note these arn’s down since I’ll need them later.
E.g.
{
    "CertificateArn": "arn:aws:acm:us-west-2:764380047232:certificate/3478a663-8927-4b93-9e11-908c7185689f"
}
At this point, I have the following files in customer_folder/ directory.
ca.crt
roger.simplyroger.com.crt
roger.simplyroger.com.key
simplyroger.crt
simplyroger.key
Create Client VPN Endpoint
Leaving the terminal, I now go back to the AWS Console to create the client vpn endpoint by choosing Client VPN Endpoints in the left navigation under the VPC Dashboard. I, then, select Create Client VPN Endpoint.
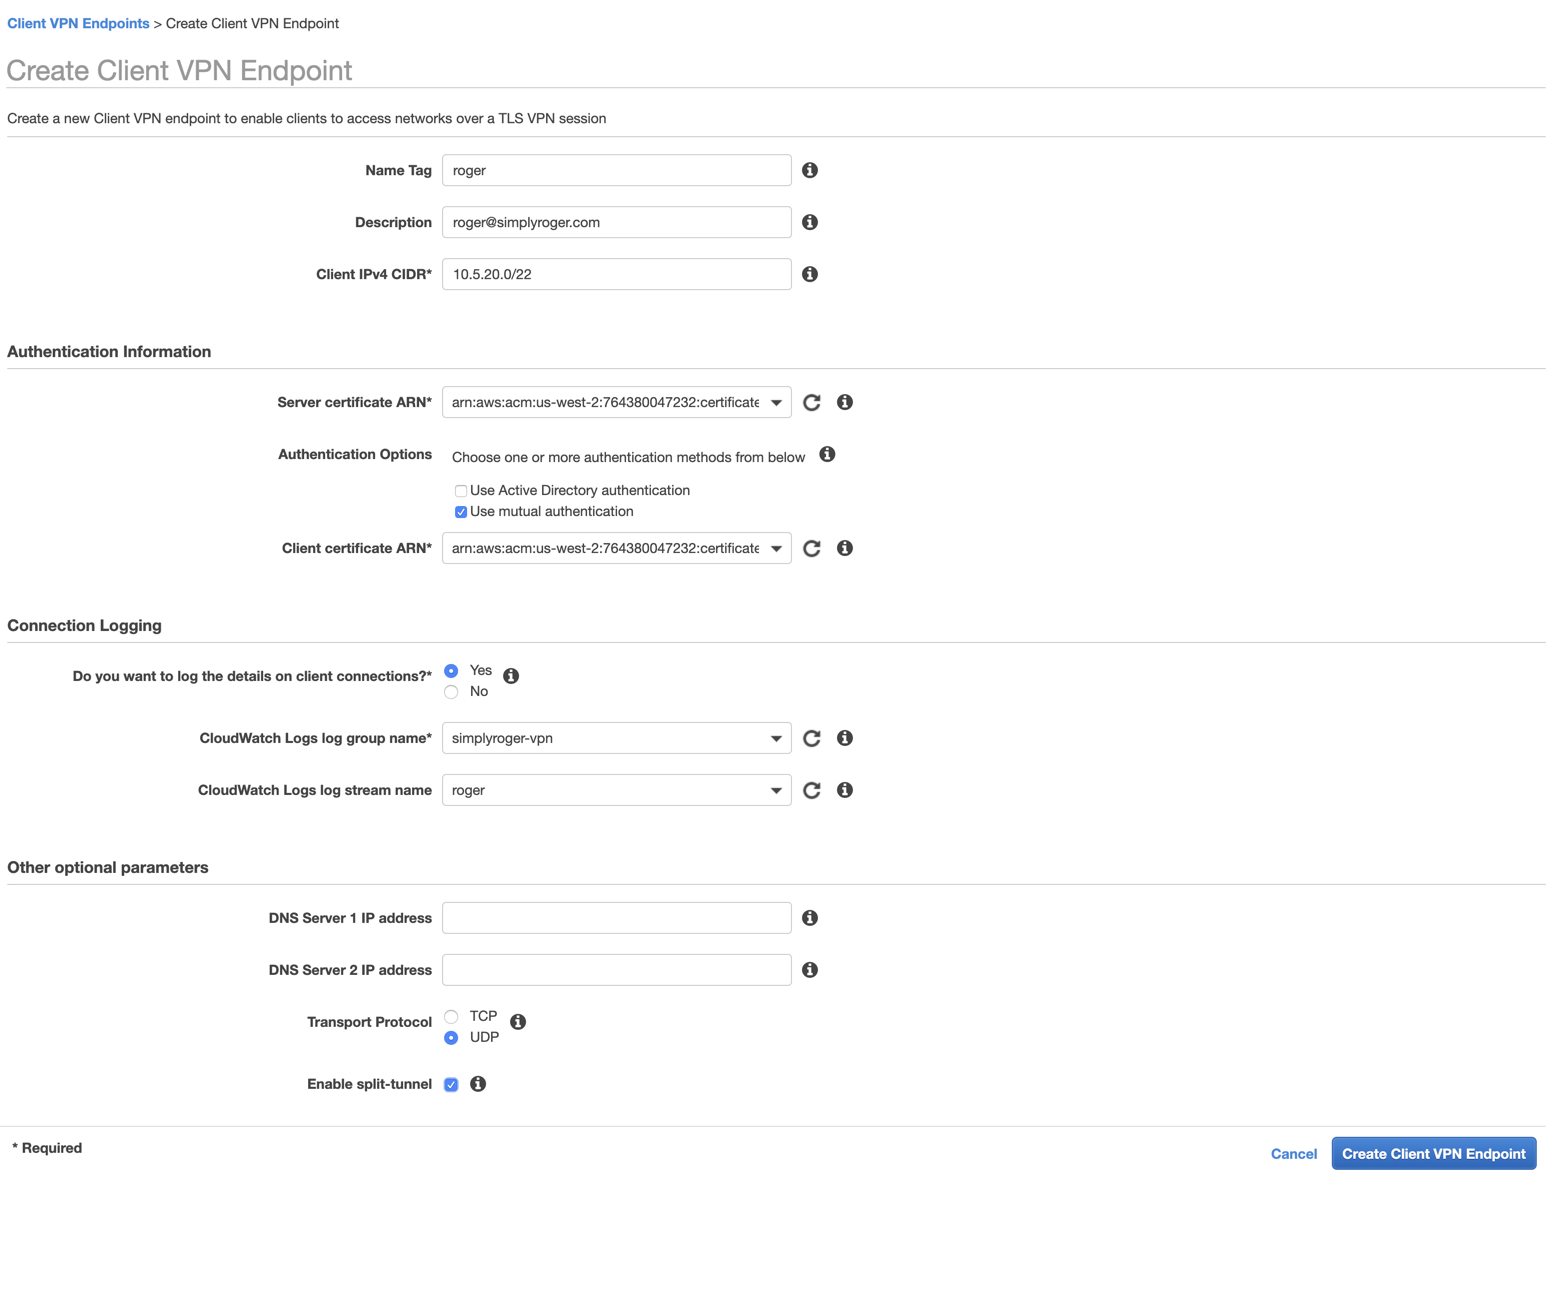
My settings are as follows:
- Name Tag:
roger - Description:
roger@simplyroger.com - Client IPv4 CIDR:
10.5.20.0/22- It is important to choose address space that does not overlap with any existing subnets. 10.5.20.0-10.5.3.255 is not within any of the subnets I set up, so this should be good.
- The smallest address space AWS lets you choose is a /22. I’m not sure why they need at least 1024 hosts, but that is a requirement.
- Server cetificate ARN:
arn:aws:acm:us-west-2:764380047232:certificate/3478a663-8927-4b93-9e11-908c7185689f -
Client cetificate ARN:
arn:aws:acm:us-west-2:764380047232:certificate/a87485d8-6282-4bc9-a6e3-2a8097bed406 - Do you want to log the details on client connections?:
Yes- CloudWatch Logs log group name:
simplyroger-vpn - CloudWatch Logs log stream name
roger
- CloudWatch Logs log group name:
- Enable split-tunnel: checked (To allow internet traffic to not go through the VPN)
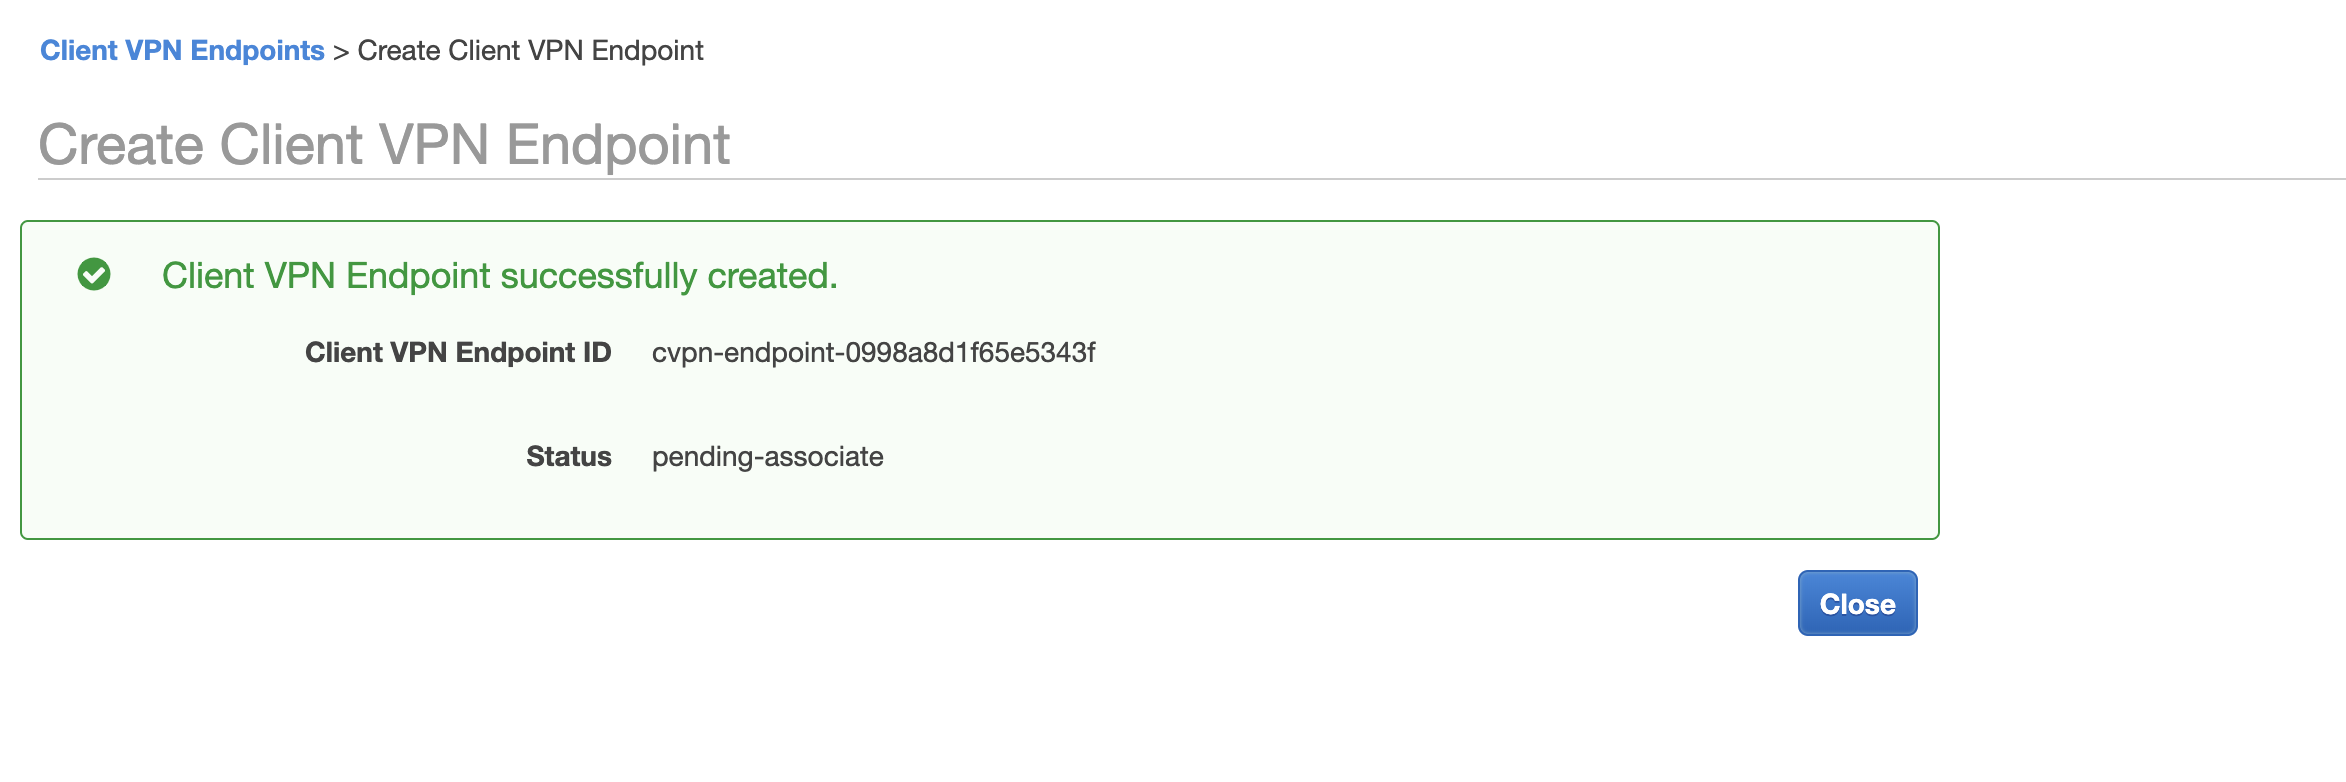
After successfully creating, I get a pending-associate status.
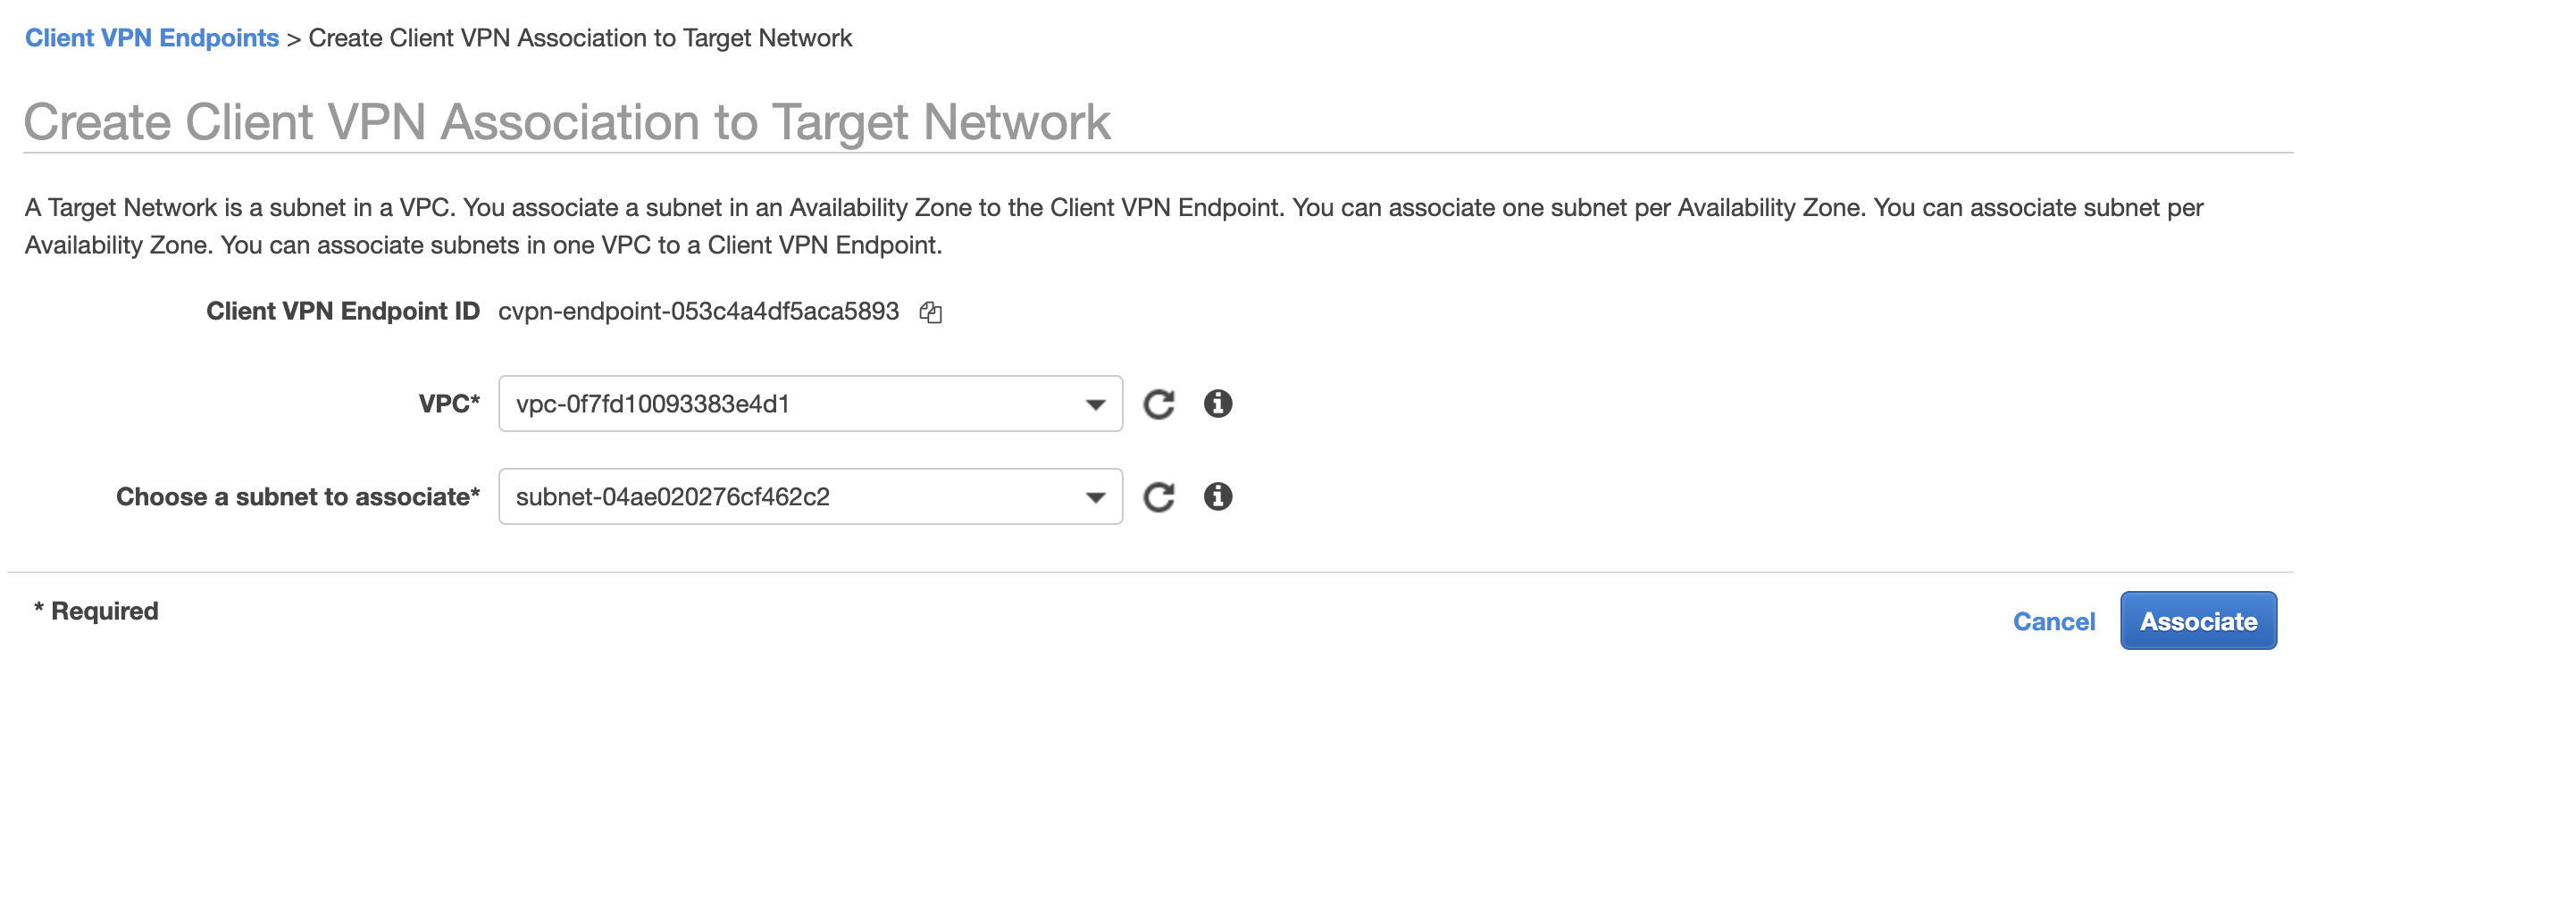
To fix the pending-associate status, I click on the associations tab inside the Client VPN Endpoints screen. I, then click on Associate to bring up the Create Client VPN Association to Target Network screen. I choose the vpn VPC and the vpn1 subnet.
- VPC:
vpc-0f7fd10093383e4d1 - Choose a subnet to associate:
subnet-04ae020276cf462c2
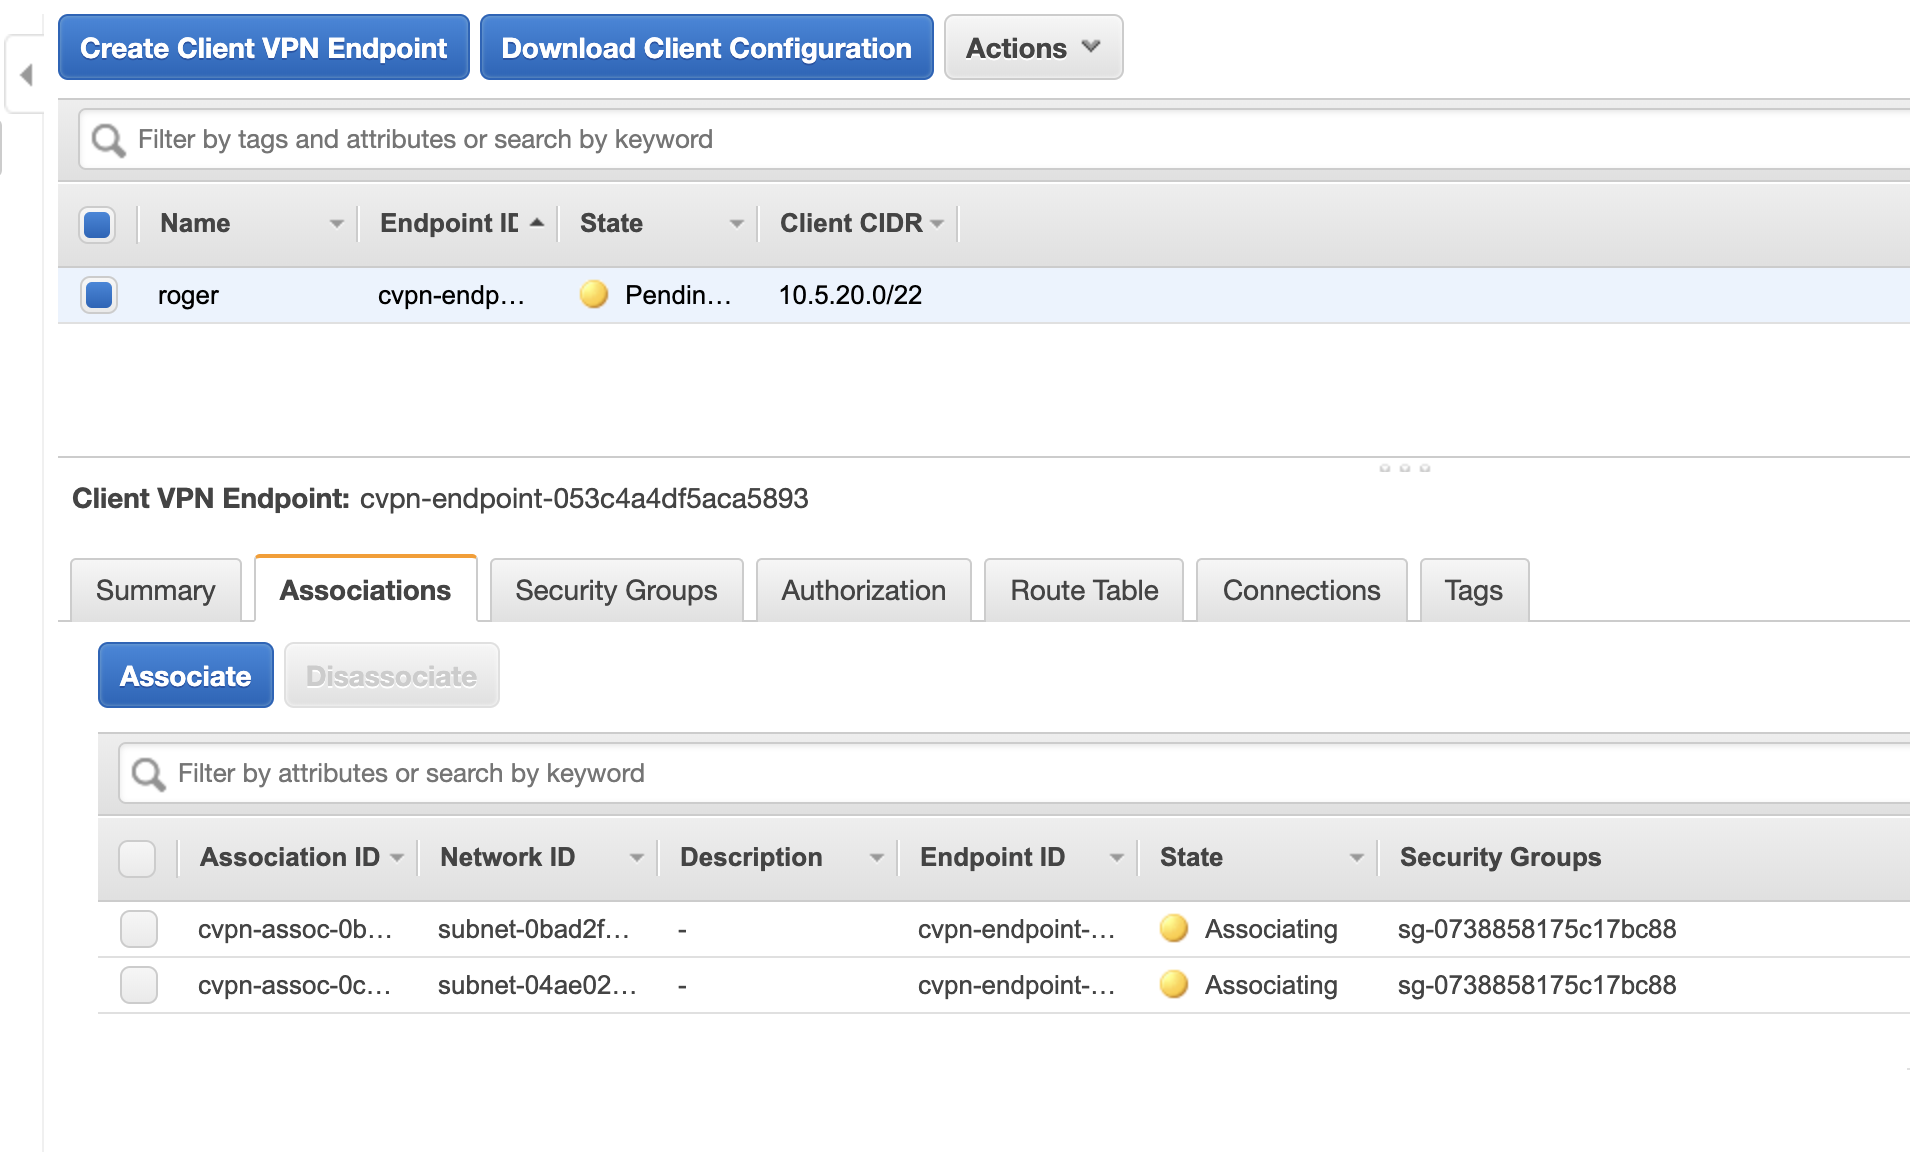
I repeat the above process to associate the vpn2 subnet which is in a different availability zone to handle possible failure if one AZ goes down. Once I add both, I see their status change to associating.
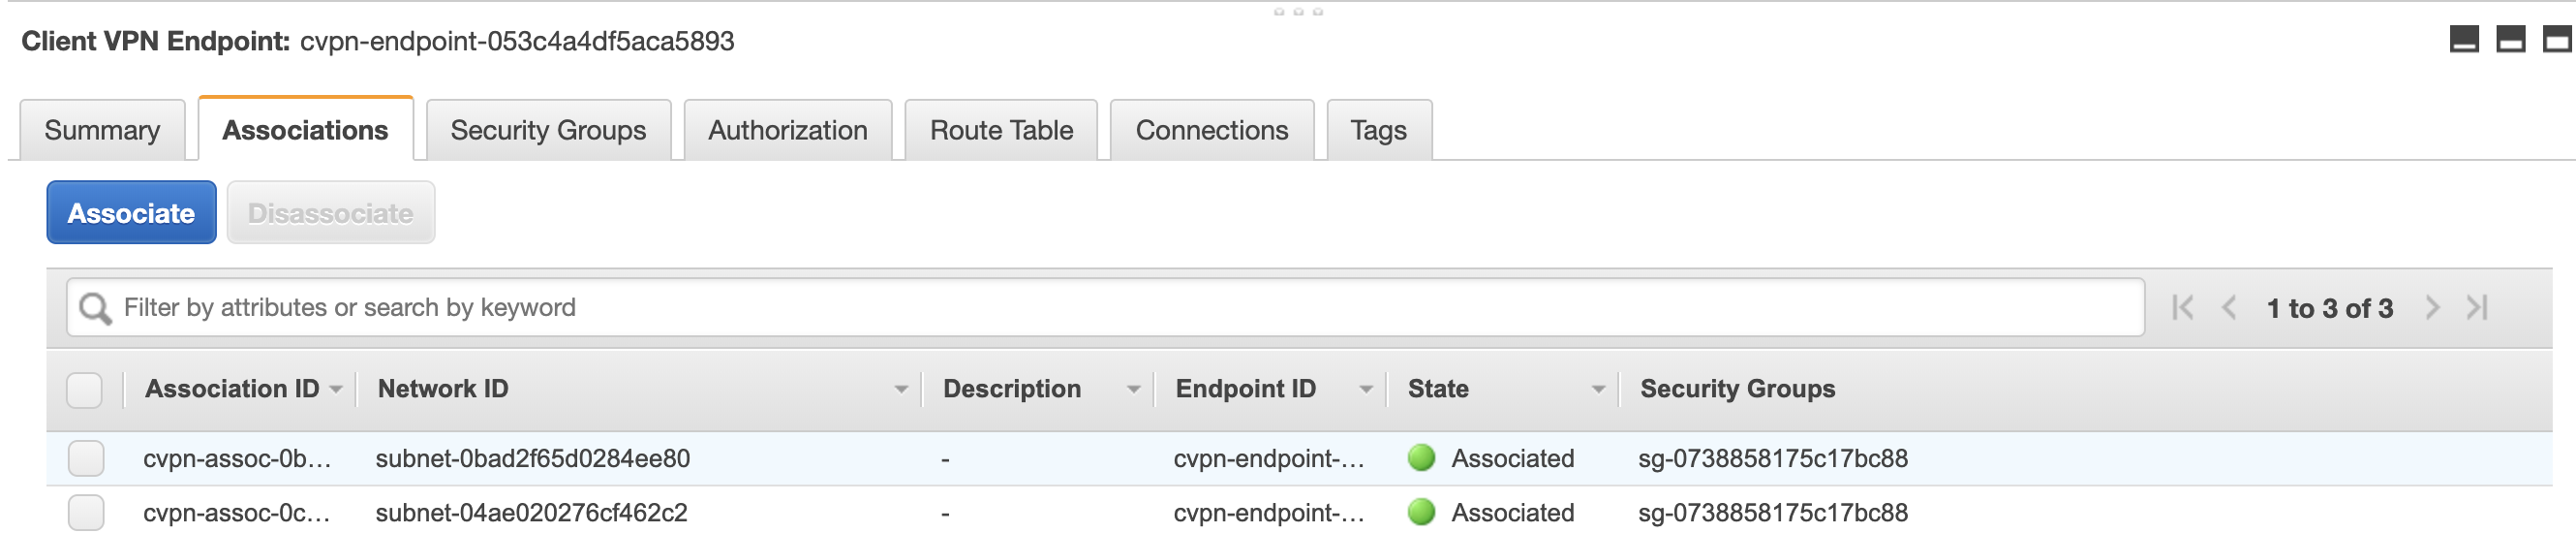
It may take a few minutes but once the endpoint is sucessfully associated, the yellow associating state should turn green and say Associated.
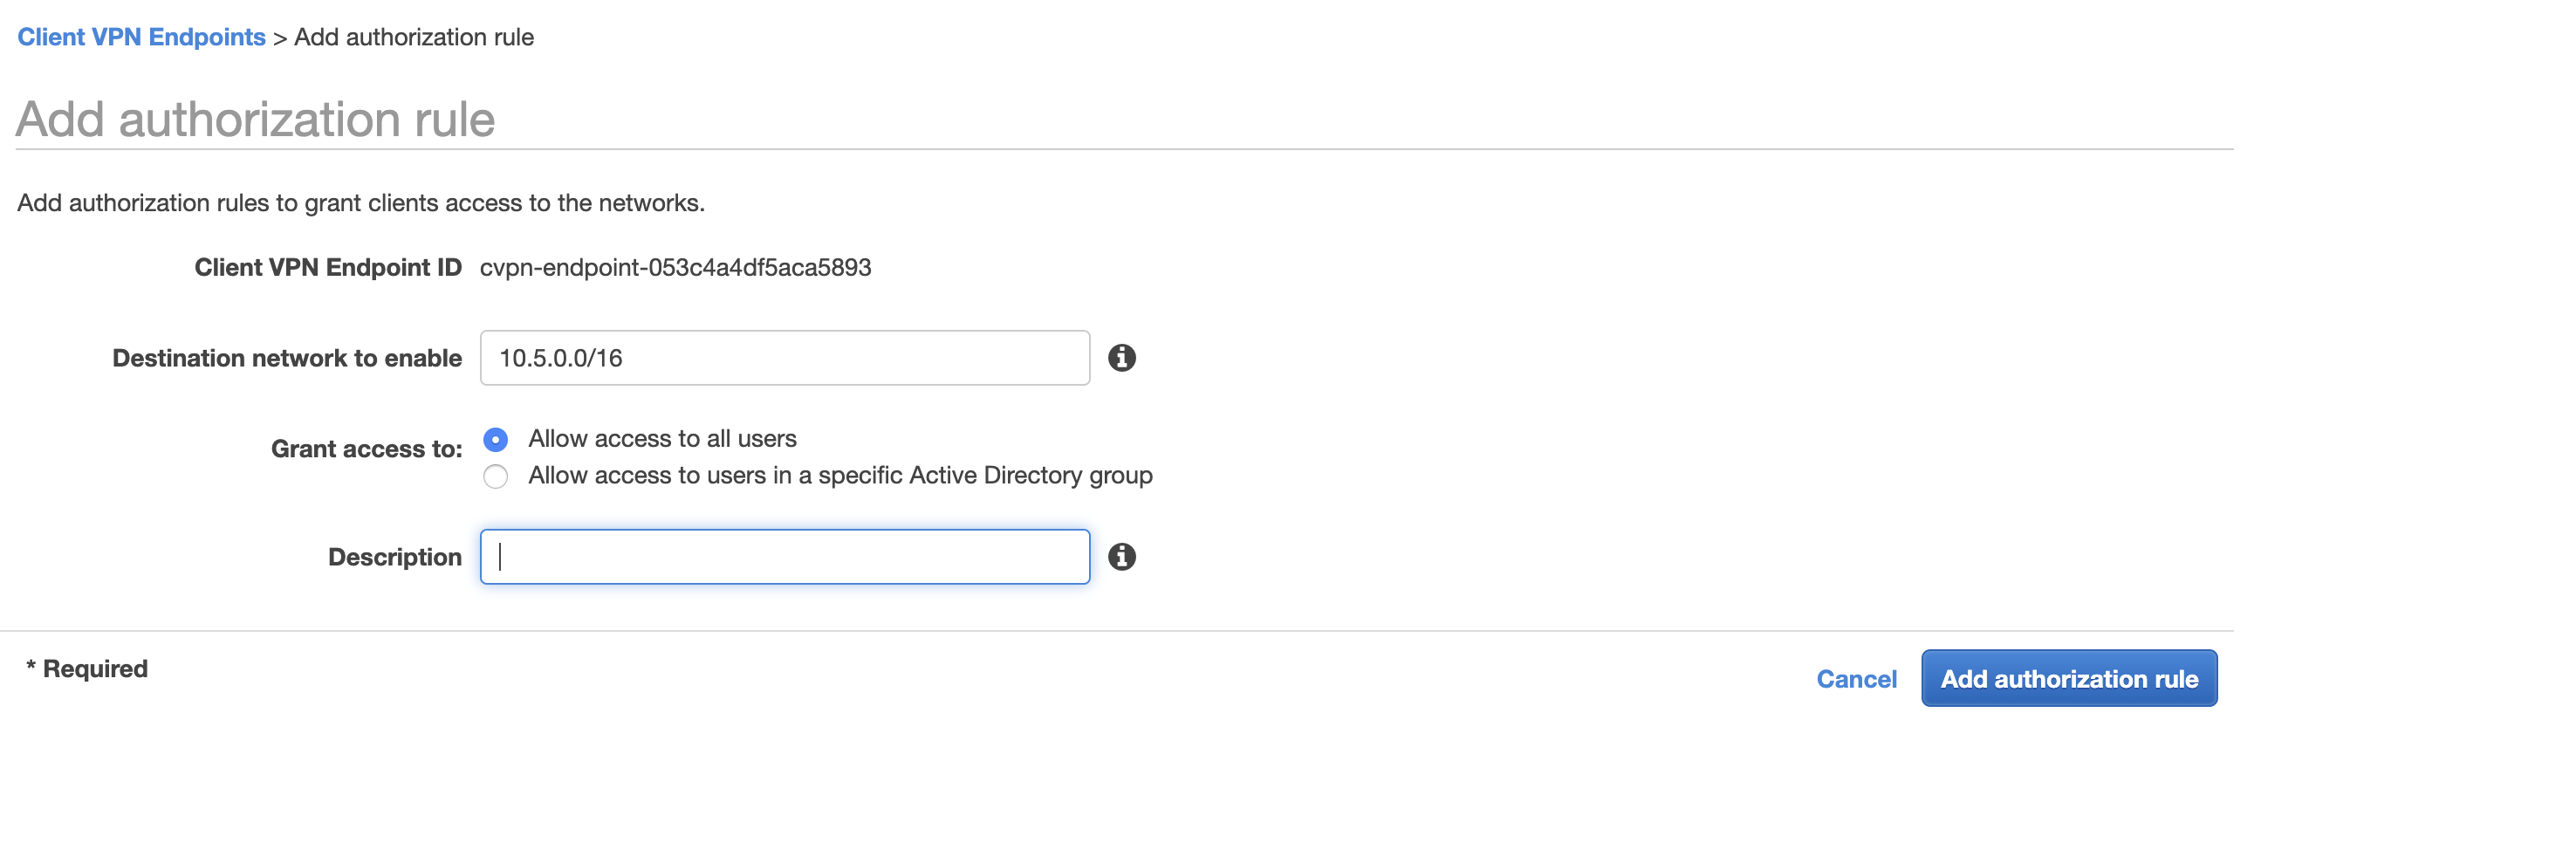
Now, I need to add authorization to the endpoint. I click on the Authorization tab (two to the left from the Associations tab) and choose *Authorize Ingress. For my testing purposes, I set access to the entire VPC as follows.
- Destination network to enable:
10.5.0.0/16 - Grant access to:
Allow access to all users
Setting up the .OVPM configuration file
The last step is to download the client configuration file – the .ovpm. At the top of the same Client VPN Endpoints screen, I click the Download Client Configuration. This drops a downloaded-client-config.opvm file in my ~/Downloads folder.
I copy the file to the custom-folder I created earlier.
cp ~/Downloads/downloaded-client-config.opvm ~/stuff/custom_folder/
According to Amazon’s instructions, I need to make two changes to the .opvm file before I install it to OpenVPN client.
- Add references to the certificate and keys files into the body of the .opvm file
- Add a random string to the front of the DNS name in the .opvm file.
I changeremote cvpn-endpoint-053c4a4df5aca5893.prod.clientvpn.us-west-2.amazonaws.com 443
to remote randomstring.cvpn-endpoint-053c4a4df5aca5893.prod.clientvpn.us-west-2.amazonaws.com 443
I add the following two lines to the end of the file:
cert /Users/roger/stuff/custom_folder/roger.simplyroger.com.crt
key /Users/roger/stuff/custom_folder/roger.simplyroger.com.key
That’s it. I import the file to my OpenVPN client. I use Viscosity, but there are many other choices.
Connecting to the VPN
The moment of truth is here. I go into Viscosity to click to connect to the vpn. It works!
I am connected with the satisfying green status light. But can I see the EC2 instance that I created earlier? I check the private IP of the EC2 which is 10.5.15.34. The private IP is only accessible from within the VPC network. If I am not tunneled into the vpc, I won’t be able to connect to this IP.
I set up two test cases.
- Ping the EC2 IP
- ssh to the EC2
ping 10.5.15.34
PING 10.5.15.34 (10.5.15.34): 56 data bytes
64 bytes from 10.5.15.34: icmp_seq=0 ttl=254 time=106.015 ms
64 bytes from 10.5.15.34: icmp_seq=1 ttl=254 time=180.781 ms
64 bytes from 10.5.15.34: icmp_seq=2 ttl=254 time=162.107 ms
64 bytes from 10.5.15.34: icmp_seq=3 ttl=254 time=206.175 ms
^C
--- 10.5.15.34 ping statistics ---
4 packets transmitted, 4 packets received, 0.0% packet loss
round-trip min/avg/max/stddev = 106.015/163.769/206.175/36.831 ms
roger@Mac-Mini-Pro custom_folder % ssh -i ~/.ssh/simplyroger.pem ec2-user@10.5.15.34
The authenticity of host \'10.5.15.34 (10.5.15.34)\' can\'t be established.
ECDSA key fingerprint is SHA256:BWnHAu46zdfHpZZjJ2ZyG/K1Dd9DiTcr/vZHN3Grr34.
Are you sure you want to continue connecting (yes/no)? yes
Warning: Permanently added '10.5.15.34' (ECDSA) to the list of known hosts.

       __|  __|_  )
       _|  (     /   Amazon Linux 2 AMI
      ___|\___|___|

https://aws.amazon.com/amazon-linux-2/
Both work. I get a response back from the EC2 instance from its private IP and can ssh into the instance.
Conclusion
There are a few extra steps to configure a client VPN connection with mutual authentication than Active Directory. I think if I had many users or were already using AD, I’d implement that authentication method. For a few users, the extra steps to generate the keys is less effort than maintaining an Active Directory instance.
Overall, I’m pleased with the setup and not needing an OpenVPN server anymore.
Thanks, AWS and thank you for reading.